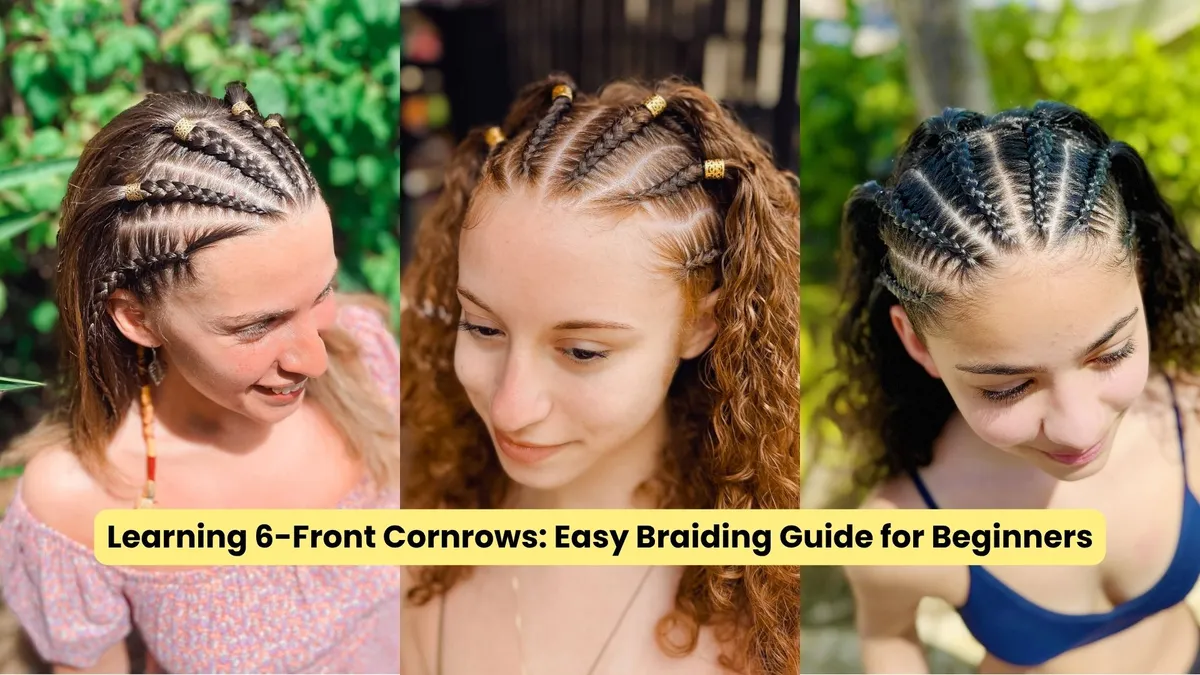
Learning 6-Front Cornrows: Easy Braiding Guide for Beginners
When clients at Sunny Braids (Puerto Rico’s top-rated braiding studio) come in looking for a protective style that balances a classic structure with clean, edgy lines, cornrows remain a longtime favorite. Among all variations (such as the side braids we’ve explained in a previous braid tutorial), the 6-front cornrow layout stands out as a masterclass in geometric precision.
I personally recommend this style to beginner braiders, as it allows you to work on the specific 5 braid actions™ you need to master. Whether you are prepping for a tropical holiday getaway, warming up for an active sports season, or simply wishing to upgrade your everyday look, this fun hairstyle frames the face beautifully while offering incredible versatility and ease.
So if you’re new to braiding and you have always wanted to master this exact pattern, you are in the right place. Let’s go through everything you need to know about preparing your (or your client’s) hair, understanding who this style is for, exploring its unbeatable advantages, and following a step-by-step masterclass to create stunning 6-front cornrows.
Who Can Wear 6-Front Cornrows?
One of the greatest benefits of the 6-front cornrow style is that everyone adores them! Because the design is adaptable, it suits a wide variety of hair textures, lengths, and face shapes.
Natural hair textures: Whether your hair is tightly coiled, kinky, wavy, or straight, cornrows anchor securely to the scalp. The natural friction of textured hair actually helps the braids grip and stay locked in place longer.
Hair length: While extremely short hair requires careful anchoring and small starting foundations, anyone with at least two to three inches of new growth can successfully rock this style, especially when working with professional braiding hair extensions.
Face shapes and personal style: The six-line layout naturally draws the eyes upward and backward, creating a striking framing effect that complements oval, round, square, and heart-shaped faces alike. It is a gender-neutral, universally flattering look that transitions seamlessly from casual athletic wear to high-end evening fashion.
Essential Tips for Preparing Your Hair
The secret to flawless cornrows isn't just in the hands of the stylist: It begins long before you pick up a comb, not to mention touching someone’s hair! No matter the style you wish to create, proper hair preparation ensures that your parts remain razor-sharp, your scalp stays comfortable, and your finished style lasts as long as possible without frizzing or unraveling.
Check hair prep in this video:
Start with a deep cleanse: Begin your prep wash day with a clarifying shampoo to get rid of any product buildup, followed by a rich, hydrating deep conditioner. Clean hair is more manageable and less prone to stubborn tangling during the braiding session.
Achieve maximum stretch: Blow-dry your hair thoroughly using the tension method or a comb attachment. Stretching the curls and coils eliminates kinks and shrinkage, providing a smooth, elongated canvas that makes feeding in extensions effortless.
Hydrate without heavy greases: While moisture is vital, avoid heavy oils or greasy leave-in creams right before braiding. Excess slip makes it difficult to maintain firm tension on the scalp, leading to loose or sliding braids. Opt for lightweight, water-based leave-in sprays instead.
Why Choose 6-Front Cornrows? Major Advantages
Before mapping out your parts, it helps to understand why this specific style is such a powerhouse in the braiding world. Compared to other popular protective styles, 6-front cornrows offer unique practical benefits:
Faster installation time: Unlike complex multi-part box braids or intricate micro-locs that can consume an entire afternoon or up to eight hours in the chair, six well-placed front cornrows take significantly less time to install, saving you valuable hours.
Budget-friendly: Because the installation process is much quicker and requires fewer individual parting structures, cornrows generally cost less at the studio, making them a fantastic choice if you want a high-end look on a more accessible budget.
Lighter weight and lower tension: Heavy box braids and bulky faux locs can place intense downward pressure on the hair follicles, leading to scalp soreness and hairline traction. Cornrows distribute weight evenly across flat lines attached to the scalp, putting less tension on sensitive areas.
Perfect for sports and active lifestyles: If you love working out, swimming, or playing competitive sports, this style is a game-changer. The flat, secure layout stays firmly in place during intense movement, won't whip around your face, and allows sweat to evaporate easily from the scalp without disrupting your neat parts.
Step-by-Step Instructions: How to Braid 6-Front Cornrows
Achieving that spotless, stitch-defined look comes down to clean parting and consistent feeding technique. Grab your rattail comb, edge control gel, and braiding hair, and let's get to work:
Check out this visual guide:
Step 1: Map Out the Six Sections
Using the fine metal tail of your comb, divide the front section of the head into six clean, parallel vertical lines running from the hairline back toward the crown or mid-scalp. Secure each section temporarily with clips to keep your workspace clean.
Step 2: Apply Product for Precision
Smooth a modest amount of edge control or firm-hold braiding gel along your first parting line. This locks down stray hairs, tames frizz, and gives your parts that signature sharp, polished finish.
See in this video how to apply the right amount of product:
Step 3: Braid Along the Scalp
Start at the front hairline using a traditional three-strand technique, crossing the outer strands under the middle strand so the cornrow pops off the scalp. Continue braiding along the scalp toward the back of the section, gathering small, even amounts of natural hair as you go—or seamlessly feeding in extension hair if added length or volume is desired.
Step 4: Transition into Free-Hanging Ends or Stop at the Crown
Depending on the design, continue braiding slightly past where the row attaches to the scalp to leave the remainder flowing into loose curls, a ponytail, or a bun, or finish the three-strand braid down the length of the hair strand without feeling obligated to take it all the way to the absolute tip.
Step 5: Secure the Ends Cleanly
Fasten the ends of each braid using tiny elastic bands or clear hair ties, ensuring they hold securely without pulling on the scalp.
Step 6: Complete All Six Rows and Polish
Repeat the process across all remaining sections, keeping equal spacing and tension. Dress up your edges with a toothbrush and edge gel for a flawless, salon-quality finish.
How to Upgrade Your 6-Front Cornrows
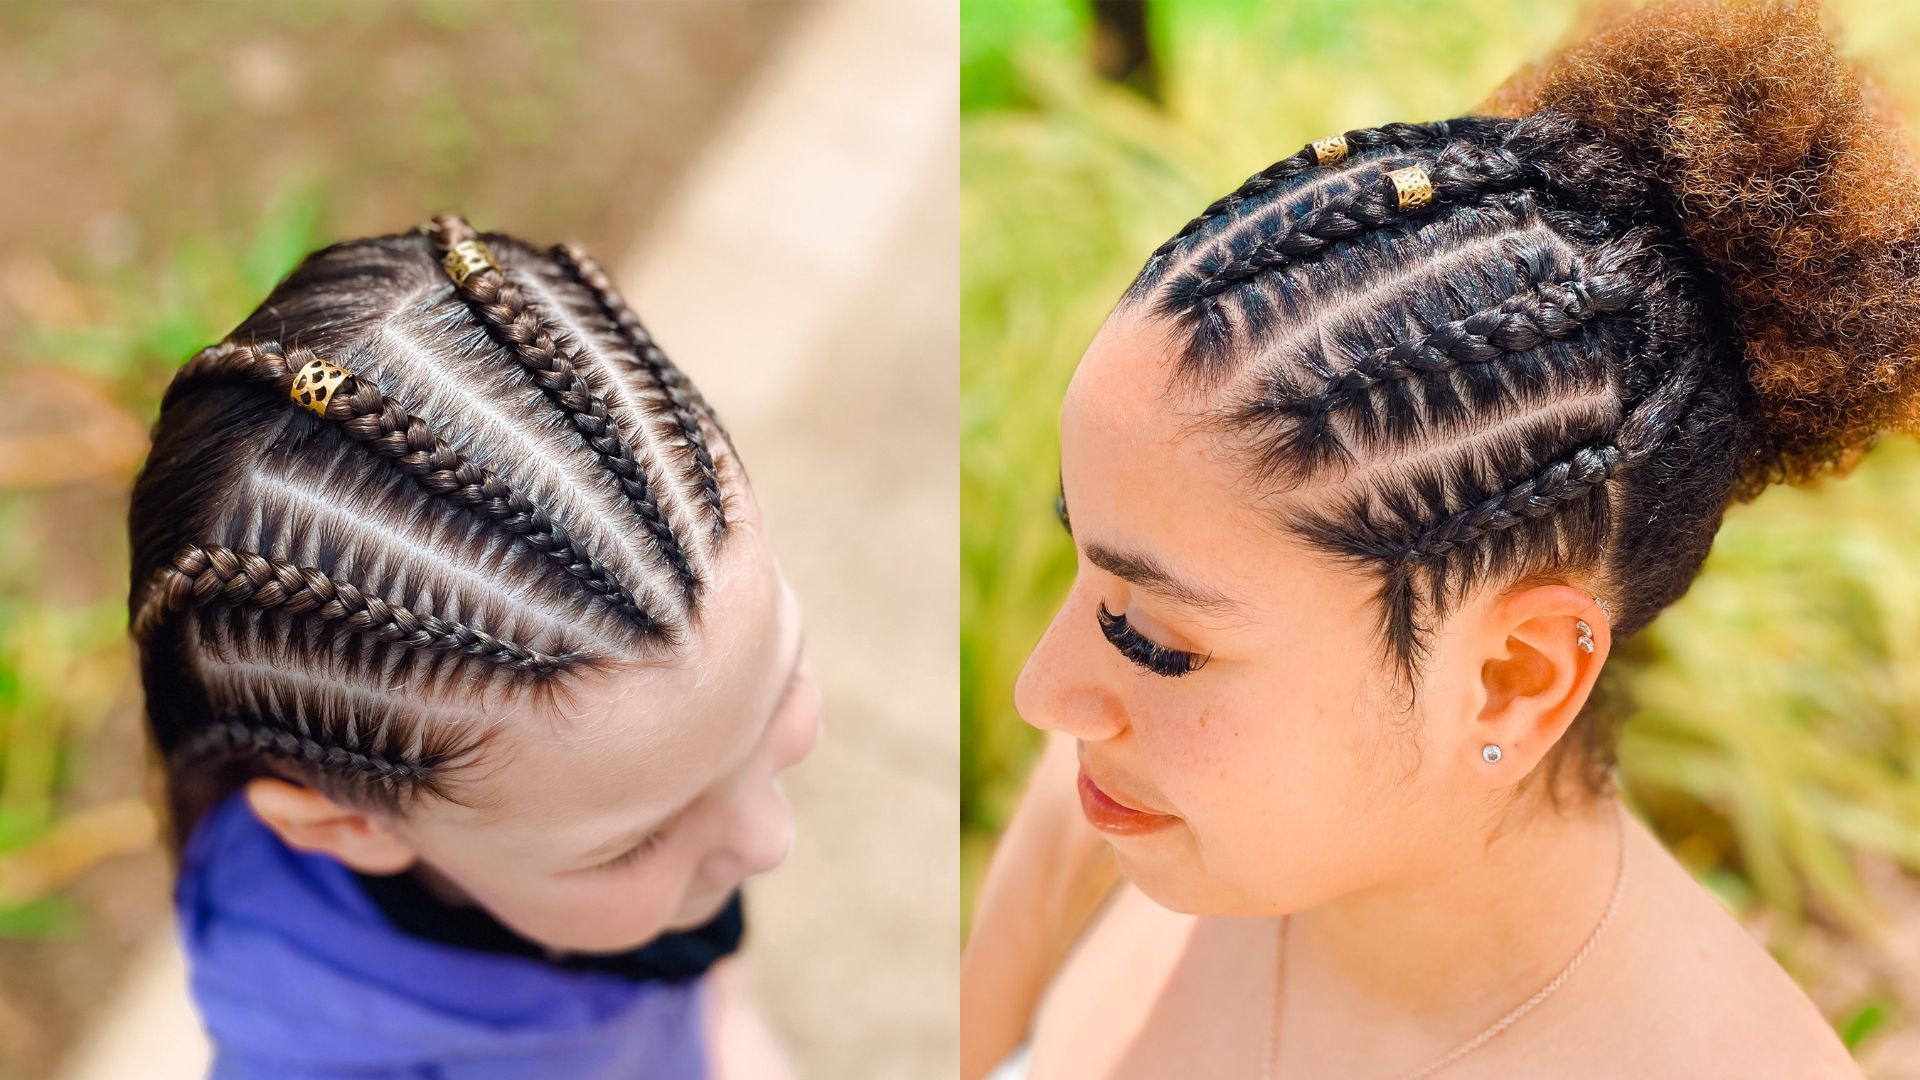
Once you have mastered the basic 6-cornrow technique, you can elevate the style with creative customizations. Adding metallic cuffs, colored threads, or decorative beads along the shafts instantly transforms a classic look into a high-fashion statement. You can also experiment with stitch braids, creating horizontal or zig-zag sub-parts between your six main rows to add unique geometric depth and personal flair.
Ready to Perfect Your Technique?
Mastering intricate scalp designs takes patience, practice, and the right guidance. If you want to refine your parting skills, troubleshoot tension issues, and learn professional secrets straight from the studio, we are here to help you grow.
Release your creative potential and start creating beautiful, professional braids in less time than you think. Learn with our online braiding course at HOWTOBRAID.COM!